# 布局
页面整体布局是一个产品最外层的框架结构,往往会包含导航、侧边栏、面包屑以及内容等。想要了解一个后台项目,先要了解它的基础布局。
# IndexLayout
IndexLayout 采用的是 Flex 布局,@/layouts/IndexLayout 目录内容如下:
IndexLayout        # 项目默认主 Layout
├── components     # IndexLayout 公共组件
├── composables    # IndexLayout 公共组合式 API
├── locales        # IndexLayout 国际化,主要为路由菜单
├── index.vue      # IndexLayout 入口
└── routes.ts      # 使用 IndexLayout 的页面路由配置
2
3
4
5
6
重要:
如何使用 IndexLayout 主要在于 IndexLayout/routes.ts 页面路由配置文件。
# 配置路由导航
比如:
@/views/home页面,想使用IndexLayout,你就可以在IndexLayout/routes.ts中做出如下配置:
import { RoutesDataItem } from '@/utils/routes';

/**
 * Index Layout 路由页面
 */
const IndexLayoutRoutes: RoutesDataItem[] = [
  {
    icon: 'home',
    title: 'index-layout.menu.home',
    path: '/home',
    component: ()=> import('@/views/home/index.vue'),
  },
];
export default IndexLayoutRoutes;
2
3
4
5
6
7
8
9
10
11
12
13
14
这样你访问 http://localhost:3000/#/home 就可以看到一个使用了 IndexLayout 的页面了。
重点:
IndexLayout/routes.ts 路由配置对应参数说明请查看 路由和菜单
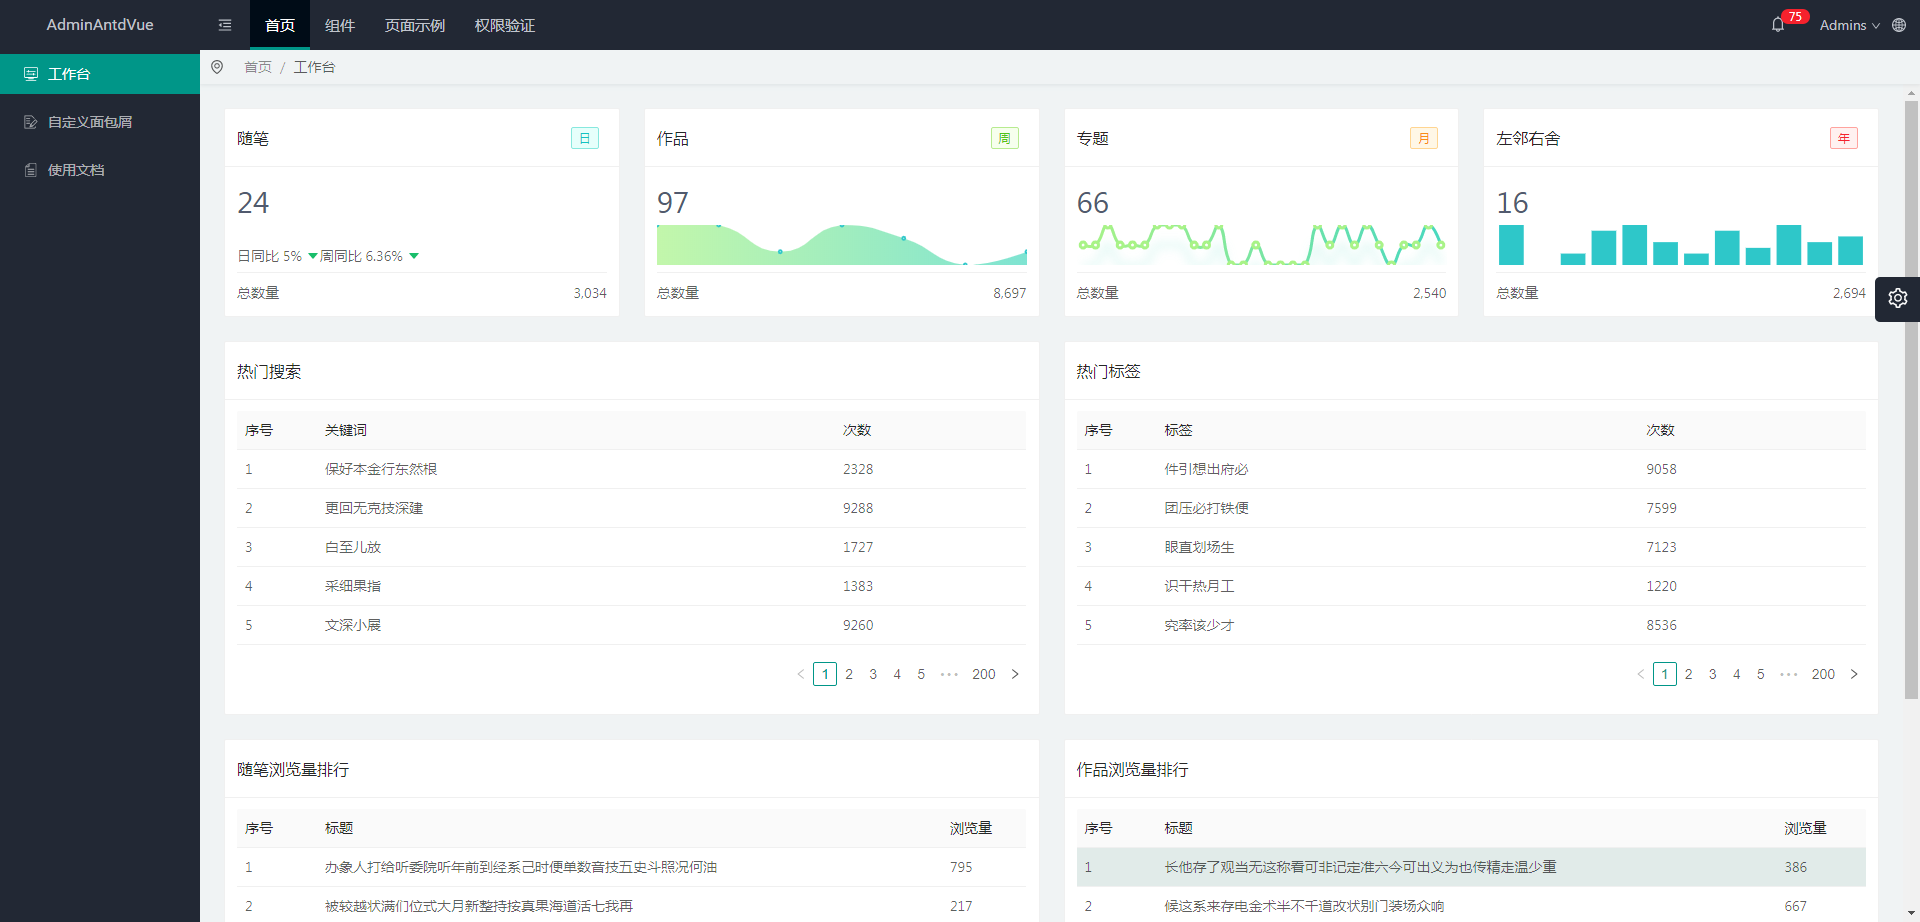
IndexLayout通过 配置/站点配置 中的 顶部菜单开启 配置项,可以设置为:有/无顶部导航等情况,如下:
# 有顶部导航
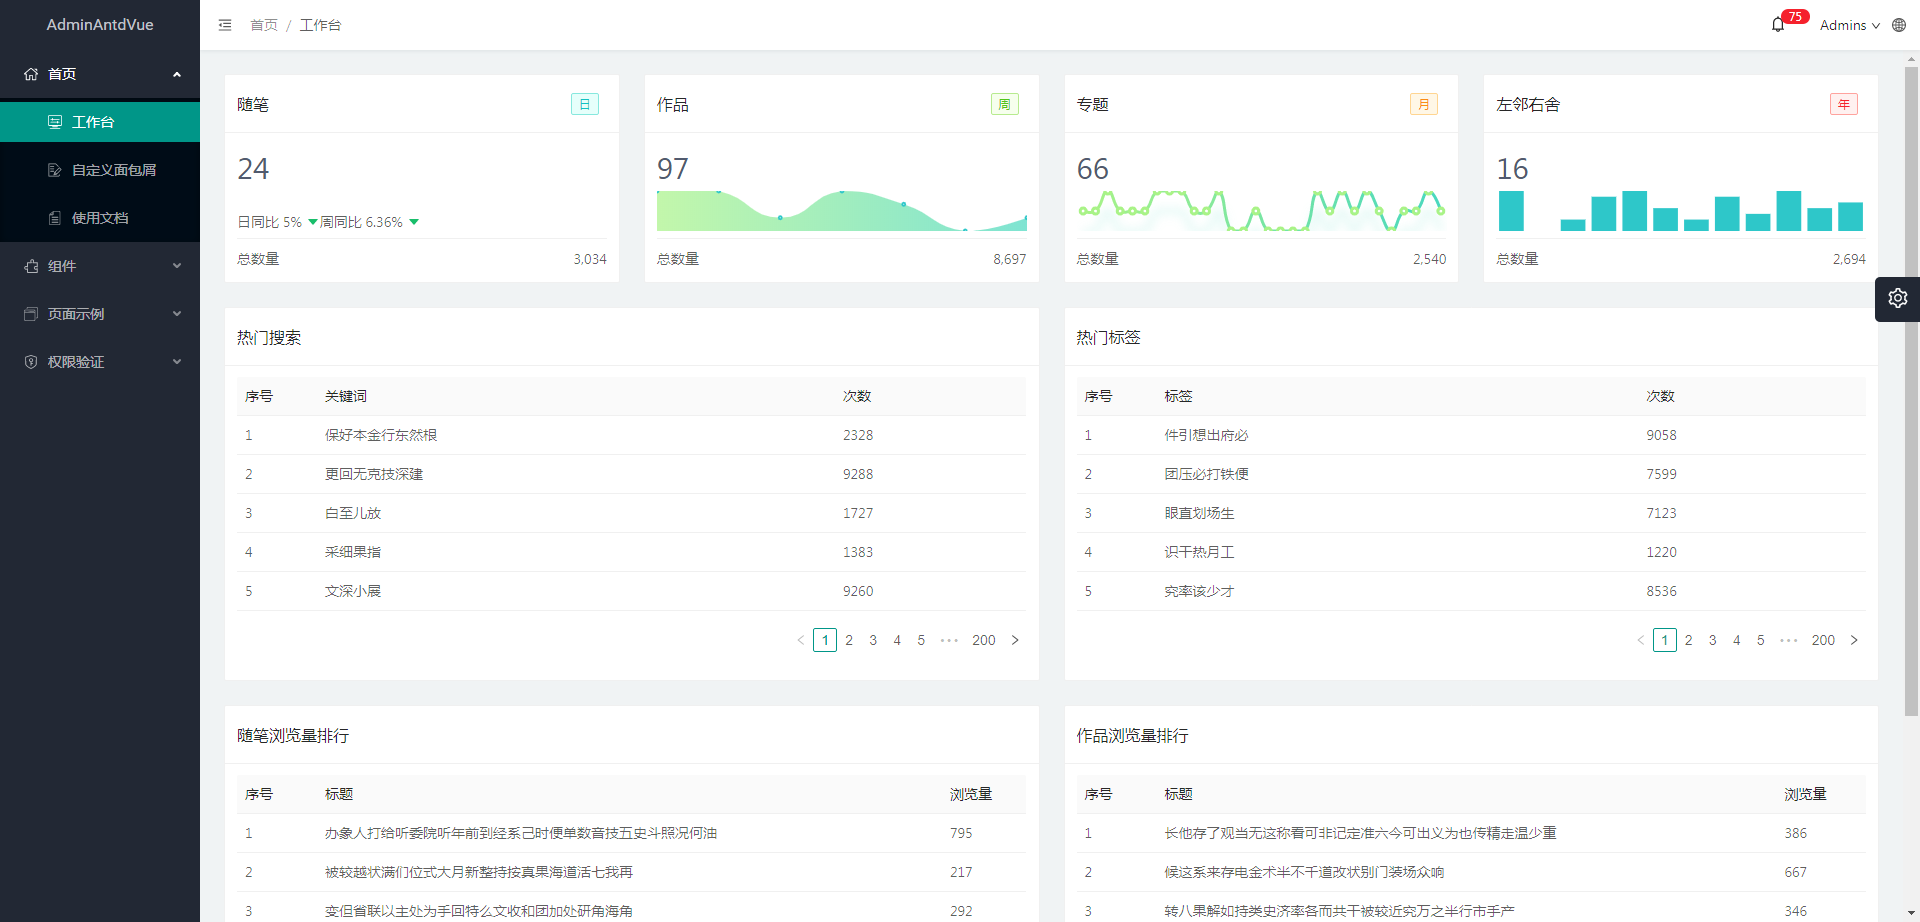
# 无顶部导航
# UserLayout
不是所有页面都会用到
IndexLayout, 比如登录 、 注册 等页面,所以本项目增加了UserLayout。
UserLayout 与 IndexLayout 目录内容基本一致,@/layouts/UserLayout 目录内容如下:
UserLayout         # 项目 UserLayout
├── locales        # UserLayout 国际化,主要为路由菜单
├── index.vue      # UserLayout 入口
└── routes.ts      # 使用 UserLayout 的页面路由配置
2
3
4
重要:
与 IndexLayout 类似, 如何使用 UserLayout 主要在于 UserLayout/routes.ts 页面路由配置文件。
# 配置路由导航
比如:登录页[
@/views/user/login]、注册页[@/views/user/register],想使用UserLayout,你就可以在UserLayout/routes.ts中做出如下配置:
import { RoutesDataItem } from '@/utils/routes';

/**
 * User Layout 路由页面
 */
const UserLayoutRoutes: RoutesDataItem[] = [
  {
    title: 'user-layout.menu.login',
    path: '/user/login',
    component: ()=> import('@/views/user/login/index.vue'),
  },
  {
    title: 'user-layout.menu.register',
    path: '/user/register',
    component: ()=> import('@/views/user/register/index.vue'),
  },
];

export default UserLayoutRoutes;
2
3
4
5
6
7
8
9
10
11
12
13
14
15
16
17
18
19
20
这样你访问 http://localhost:3000/#/user/login 、 http://localhost:3000/#/user/register 就可以看到一个使用了 UserLayout 的登录、注册页面了。
重点:
与 IndexLayout 一致, UserLayout/routes.ts 路由配置对应参数说明请查看 路由和菜单
# 自定义Layout(UniversalLayout)
在实际的项目开发中,以上 Layout 并不一定能满足要求,这就需要我们自定义新增 Layout 了。比如我们自定义一个
MemberLayout,步骤如下:
TIP
你可以在@/config/routes.ts中把IndexLayout 替换 UniversalLayout 进行测试
# 一、创建目录结构
在目录 @/layouts 下创建 MemberLayout 文件夹,目录如下,
MemberLayout       # MemberLayout
├── locales        # MemberLayout 国际化,主要为路由菜单
├── index.vue      # MemberLayout 入口
└── routes.ts      # 使用 MemberLayout 的页面路由配置
2
3
4
以上文件对应的代码可以参照 UserLayout 修改和删减。
# 二、导入框架路由
MemberLayout 创建完成后,需要保证可以路由使用,所以就需要把 MemberLayout/routes.ts 导入 @/config/routes.ts 中, @/config/routes.ts 新增如下代码:
import { createRouter, createWebHashHistory } from 'vue-router';
import { RoutesDataItem } from "@/utils/routes";
import settings from "@/config/settings";

import SecurityLayout from '@/layouts/SecurityLayout.vue';

import IndexLayoutRoutes from '@/layouts/IndexLayout/routes';
import IndexLayout from '@/layouts/IndexLayout/index.vue';

import UserLayoutRoutes from '@/layouts/UserLayout/routes';
import UserLayout from '@/layouts/UserLayout/index.vue';


/**
 * Member Layout 路由页面
 */
import MemberLayoutRoutes from '@/layouts/MemberLayout/routes'; // 新增代码
import MemberLayout from '@/layouts/MemberLayout/index.vue'; // 新增代码


const routes: RoutesDataItem[] = [
  {
    title: 'empty',
    path: '/',
    component: SecurityLayout,
    children: [
      {
        title: 'empty',
        path: '/',
        redirect: settings.homeRouteItem.path,
        component: IndexLayout,
        children: IndexLayoutRoutes
      },
      {
        title: 'empty',
        path: '/refresh',
        component: () => import('@/views/refresh/index.vue'),
      },
    ]
  },
  {
    title: 'empty',
    path: '/user',
    redirect: '/user/login',
    component: UserLayout,
    children: UserLayoutRoutes
  },

  /* 新增代码 S */
  {
    title: 'empty',
    path: '/member',
    component: MemberLayout,
    children: MemberLayoutRoutes
  },
  /* 新增代码 E */

  {
    title: 'app.global.menu.notfound',
    path: '/:pathMatch(.*)*',
    component: () => import('@/views/404/index.vue'),
  }
]

const router = createRouter({
  scrollBehavior(/* to, from, savedPosition */) {
    return { top: 0 }
  },
  history: createWebHashHistory(import.meta.env.BASE_URL),
  routes: routes,
});

export default router;
2
3
4
5
6
7
8
9
10
11
12
13
14
15
16
17
18
19
20
21
22
23
24
25
26
27
28
29
30
31
32
33
34
35
36
37
38
39
40
41
42
43
44
45
46
47
48
49
50
51
52
53
54
55
56
57
58
59
60
61
62
63
64
65
66
67
68
69
70
71
72
73
74
至此新增自定义Layout完成:
使用方法与 UserLayout 、 IndexLayout 一致。